Replacing a roof doesn’t have to drain your wallet. Most people think it’s all or nothing—either go all-in with expensive materials or take the risk of shoddy work. But here’s the truth: You can replace a roof properly, safely, and affordably, all without cutting corners or sacrificing long-term value. It just takes smart planning, knowing where you can save, and finding the right team to trust.
The good news? We’ve done the digging for you and broken it down into easy-to-understand tips that everyday Aussies can follow without the builder’s jargon.
How to Replace a Roof Without Going Broke
We get it—roof repairs sound pricey. But not every fix means a full tear-off and total rebuild. Sometimes, saving money comes down to knowing the difference between a must-do and a maybe-later.
Here’s what really helps keep costs low when you decide to replace a roof:
Pick cost-effective materials – You don’t need top-shelf tiles to get solid protection.
Work with local roofers – They know the area, weather, and best budget options.
Ask about partial replacements – Not the whole roof always needs to go.
Time it right – Off-season jobs can come with discounts.
Focus on durability – Paying a bit more for longer-lasting material can save heaps later.
And if you’re unsure where to begin, it’s worth starting with a free roof inspection from a trusted local team like Smile Roofing—they’re known across Australia for helping homeowners get more bang for their buck.
Materials That Cut Costs Without Cutting Corners
When you replace a roof, your choice of materials matters more than you think. Not just for quality—but for how much you’ll pay upfront and in the long run.
Let’s look at some solid, budget-friendly options:
Metal Roofing Durable, lightweight, and great in harsh Aussie weather.
Lasts 40–70 years
Reflects heat—great for hot regions
Costs less than terracotta tiles
Recyclable and low-maintenance
Asphalt Shingles Popular in the U.S., and gaining ground here too.
Cheapest upfront cost
Quick to install
Comes in heaps of styles
Lifespan: 15–30 years
Corrugated Roofing Sheets Classic Aussie look with wallet-friendly pricing.
Long life and great water drainage
Rust-resistant options available
Ideal for sheds and older-style homes
Roofing Material Price Comparison Table
Material Type
Average Lifespan
Budget Range (per m²)
Maintenance Level
Metal Roofing
40–70 years
$50–$100
Low
Asphalt Shingles
15–30 years
$30–$60
Medium
Corrugated Sheets
30–50 years
$45–$85
Low
Concrete Tiles
30–50 years
$55–$110
Medium
Terracotta Tiles
50–100 years
$80–$150
High
Why Labour Costs Can Make or Break Your Budget
Choosing to replace a roof doesn’t just involve buying materials. The people putting it on matter just as much. Labour is where costs often spike—but that doesn’t mean you should hire the cheapest crew you can find.
What’s more important is finding licensed, experienced tradies who offer fair quotes and don’t sneak in surprise fees. Reviews, word-of-mouth, and platforms like Google Maps listings can give you a peek at who’s worth your time (and who’s not).
Look out for:
Free quotes with breakdowns
Fixed pricing with no hidden extras
Clear timelines and communication
Local crews who know council rules
Remember, the cheapest quote upfront might cost more in repairs down the road. Find the sweet spot where value meets reliability.
Don’t Replace a Roof Without Asking These Questions
Before you agree to anything, ask your roofer these must-know questions:
Do you offer a workmanship warranty?
Is the quote fully itemised?
How do you handle bad weather delays?
Do you remove and dispose of the old roof?
What’s your experience with similar homes in this area?
These help you spot red flags early and keep your project running smooth.
Simple Fixes That Delay a Full Roof Replacement
Sometimes, it’s not yet time to replace a roof completely. There are temporary fixes that can give your current roof more life while saving you money right now.
Here are a few:
Re-sealing flashing – Stops leaks near chimneys and skylights
Replacing a few cracked tiles – No need to redo the whole thing
Roof painting or sealing – Adds protection and new life to old surfaces
Cleaning and gutter maintenance – Stops water damage early
Roofing pros like Smile Roofing’s local team can help you figure out if your roof just needs patching or if it’s finally time for a full replacement.
Best Time to Replace a Roof for Budget Savings
Yes, timing matters. If you plan to replace a roof during peak demand (like summer), you’ll likely pay more. But many roofing companies offer better prices during quieter months when crews are available and materials cost less.
Ideal seasons to consider:
Autumn – Cooler temps, fewer storms
Late winter/early spring – Before busy season hits
Post-storm periods – If damage has occurred but demand is still low
Tip: Ask if your roofer offers off-season pricing or discounts for weekday jobs.
Look for Signs That Say It’s Time to Replace a Roof
Don’t wait for water to drip on your head. Your roof usually sends warning signs before it completely fails.
Here’s what to watch for:
Sagging or drooping areas
Water stains on ceilings
Rusted metal or broken tiles
Light coming in through the attic
Mould or moss build-up
If any of these show up, it’s time to get it checked—fast.
Affordable Roof Replacement Is About Smart Choices, Not Cheap Shortcuts
There’s a big difference between doing something affordably and doing it poorly. When you replace a roof the smart way, you protect your home, save money in the long run, and avoid constant repairs.
It all comes down to this:
Choose long-lasting materials over quick fixes
Work with roofers who offer transparent pricing and real support
Don’t rush—plan, inspect, and make decisions that suit your budget and home
Ask the right questions and compare more than just numbers on a quote
There’s no need to panic or overspend. With a bit of planning and the right crew on your side, you can replace a roof without cutting corners—or your savings.
Owning a home is a dream come true—but when it comes to roofing, the costs can feel like a nightmare. We get it. That’s why we’ve pulled together the best budget-friendly roofing options to help homeowners save money without cutting corners on quality. Whether you’re fixing up your forever home or giving your investment property a solid top, there are smart choices out there that won’t burn a hole in your pocket.
Let’s explore the most affordable ways to stay covered—literally.
Asphalt Shingles: The Crowd Favourite
If you’re hunting for budget-friendly roofing options, asphalt shingles are usually the first choice people go for—and with good reason. They’re affordable, quick to install, and available in loads of colours and styles. You don’t need to be rolling in cash to get a good-looking roof.
Homeowners love asphalt because:
It’s lightweight, so no extra structural support is needed.
It’s easy to repair if damaged.
It suits almost every home design, from cottages to townhouses.
Most asphalt roofs can last around 15–30 years. And while they’re not the longest-lasting option, their low cost makes them ideal for folks on a budget or anyone who plans to sell within that timeframe.
Here’s a quick breakdown:
Feature
Asphalt Shingles
Cost (per m²)
$30–$50
Lifespan
15–30 years
Maintenance
Low to Medium
Colours & Styles
Wide range available
Installation Speed
Fast (2–5 days)
You’ll see why they’ve stayed one of the top budget-friendly roofing options for decades.
If you want expert advice on what colour or style suits your home best, the team at Smile Roofing is always ready to help with friendly guidance and top-quality workmanship.
Corrugated Metal Roofs: Aussie Strong
Corrugated metal roofing is as Aussie as a meat pie at the footy. It’s been keeping homes safe through storms, heatwaves, and even the odd hail hit.
Among the most reliable budget-friendly roofing options, corrugated metal brings serious strength without massive cost. It’s not just practical—it looks great too, especially on modern or rural homes.
Why corrugated metal works:
Handles tough weather like a champ.
Lasts 40+ years with basic upkeep.
Reflects sunlight, helping to keep your house cooler.
You can even pick from galvanised steel, zincalume, or colourbond depending on your budget and location. Plus, it’s recyclable, which is a win for the planet and your conscience.
Quick pros and cons:
Pros:
Extremely durable
Fast installation
Fire-resistant
Lightweight
Cons:
Can be noisy during rain (some folks love it!)
Might need insulation to prevent heat transfer
No wonder so many homeowners choose this as one of the go-to budget-friendly roofing options when they want something that lasts and looks sharp.
Need a quote or want to see how it looks in your area? Check out their local map location here and get in touch easily.
Concrete Tiles: Heavyweight Performance
Looking for strength on a budget? Concrete tiles deliver the goods. They may be a bit heavier than other materials, but they last for decades and won’t cost as much as fancy slate or clay.
Homeowners often choose them when they want a mix of style and savings. They come in different finishes—matte, gloss, or something in-between—and suit both classic and modern builds.
Some reasons folks love concrete tiles as budget-friendly roofing options:
They can last 50 years or more.
They hold up well to high winds and rough weather.
They come in a wide variety of colours and shapes.
A few trade-offs to think about:
They’re heavy—your roof might need extra support.
Installation takes longer than lighter materials.
They can crack if walked on.
Still, their long life makes them one of the smartest budget-friendly roofing options if you’re in it for the long haul.
Bitumen Roof Sheets: For Small Budgets and Big Ideas
Bitumen roof sheets don’t get the spotlight often, but they’re quietly becoming a top choice for sheds, garages, and even small homes on tight budgets.
Think of them as the underdog of roofing—simple, cheap, and surprisingly tough.
Bitumen roofing is:
Super easy to install (great for DIYers).
Great at waterproofing.
Lightweight and flexible.
These sheets may not last as long as other types, but for secondary structures or short-term fixes, they’re brilliant.
Typical uses:
Garden sheds
Granny flats
Tiny homes
Storage areas
They check all the boxes for budget-friendly roofing options, especially when money’s tight and you need something reliable fast.
Recycled Roofing: Smart and Sustainable
Going green while saving green? Recycled roofing materials could be your perfect match. Many homeowners are now choosing second-hand tiles or reprocessed metal sheets that have been cleaned, tested, and ready for round two.
Benefits of recycled roofing:
Major cost savings
Reduces landfill waste
Works just like new in most cases
Here are some common materials reused:
Reclaimed terracotta tiles
Salvaged slate
Recycled metal sheeting
When sourced properly, recycled roofing performs just as well as fresh stock. It’s one of those hidden-gem budget-friendly roofing options you won’t regret exploring.
How to Pick the Right Roof Without Breaking the Bank
Choosing between these budget-friendly roofing options can feel like picking your favourite footy team—everyone’s got their own top pick. But it really comes down to:
Where you live: Some materials handle coastal air better than others. How long you plan to stay: Short-term fix or lifetime roof? What your home looks like: You’ll want a roof that matches the style. Your budget now vs future costs: Cheap now might mean spending more later.
Here’s a fast cheat sheet to help:
Roofing Type
Best For
Price Range
Asphalt Shingles
Short-term savings
$
Corrugated Metal
Aussie homes & harsh weather
$$
Concrete Tiles
Long-term value
$$$
Bitumen Sheets
Small builds or quick fixes
$
Recycled Roofing
Eco-minded savings
$–$$
All of these budget-friendly roofing options offer solid performance without the massive price tag—just depends on what you need most.
Ready to chat about the best roof for your home? The friendly team at Smile Roofing is only a call or click away. Whether you’re chasing durability, saving cash, or just want the job done right the first time, they’re your trusted local pros with years of hands-on experience and honest service.
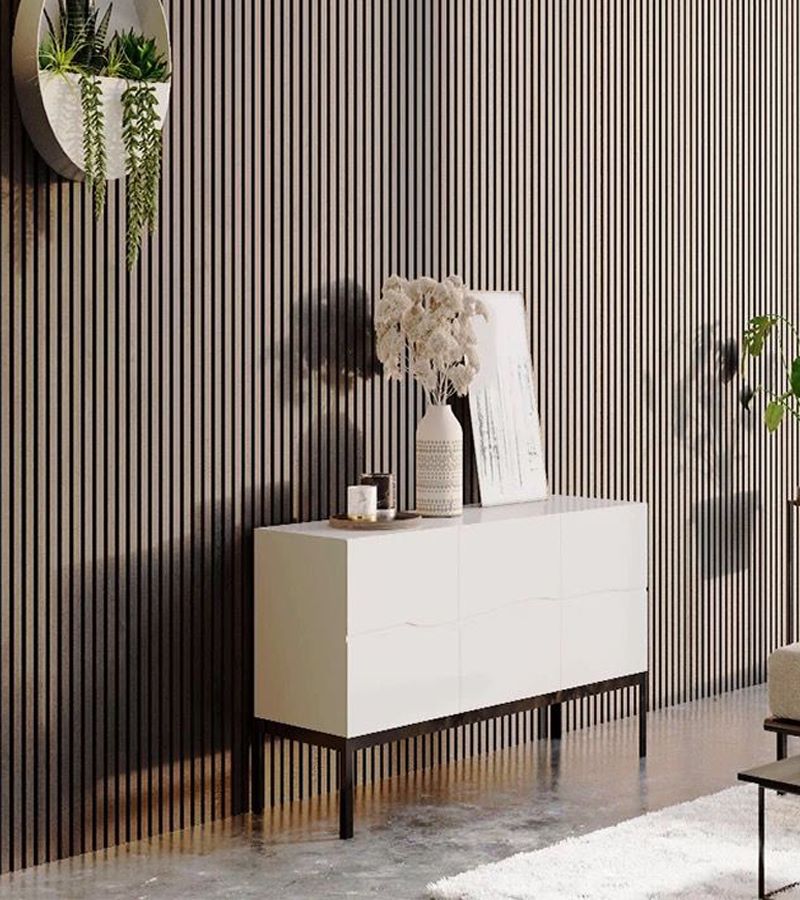
Cutting a slat wall requires careful planning and precise execution to achieve a professional finish. Whether you’re a DIY enthusiast or a seasoned professional, understanding the nuances of this task is essential. This guide provides practical tips to help you cut a slat wall with accuracy and confidence.
Understanding Slat Walls
Slat walls are versatile panelsfeaturing evenly spaced grooves, commonly used in retail displays, garages, and interior design to organize or showcase items. They come in various materials, including medium-density fiberboard (MDF) with real oak finishes, offering both functionality and aesthetic appeal.
Preparation: Setting the Stage for Precision
Before cutting a slat wall, thorough preparation is crucial:
Measure Twice, Cut Once: Accurate measurements prevent mistakes. Use a reliable tape measure to determine the exact dimensions needed.
Marking the Cut Line: Clearly mark the cutting line with a pencil and a straightedge to ensure a straight cut.
Selecting the Right Tools: Choose appropriate tools based on the slat wall material. For MDF panels, a circular saw with a fine-tooth blade is effective. Ensure all tools are in good working condition.
Safety First
Prioritizing safety is essential:
Protective Gear: Wear safety glasses to shield your eyes from debris and a dust mask to avoid inhaling particles.
Stable Work Surface: Secure the slat wall panel on a stable workbench or sawhorses to prevent movement during cutting.
Cutting Techniques for Slat Walls
Employing the right cutting techniques ensures precision:
Scoring the Cut Line: Lightly score along the marked line with a utility knife to minimize chipping, especially on veneered surfaces.
Steady Cutting: Maintain a consistent speed and steady hand while guiding the saw along the marked line to achieve a clean cut.
Support the Panel: Provide adequate support to both sides of the panel during cutting to prevent splintering or breakage.
Finishing Touches
After cutting, attention to detail enhances the final appearance:
Sanding Edges: Smooth any rough edges with fine-grit sandpaper to prepare the surface for finishing.
Sealing Exposed Areas: Apply edge banding or sealant to exposed cuts, especially on MDF, to protect against moisture and achieve a polished look.
Common Mistakes to Avoid
Being aware of common pitfalls can improve your results:
Rushing the Process: Take your time to ensure accuracy; haste can lead to errors.
Using Dull Blades: Always use sharp blades to achieve clean cuts and reduce the risk of accidents.
Ignoring Material Specifications: Different materials require specific cutting techniques; adhere to manufacturer guidelines for best results.
Enhancing Your Workspace with Slat Walls
Slat walls are not only functional but also enhance the aesthetic appeal of a space. For instance, installing wood slat panels in a home office can significantly improve its look and feel. These panels are available in various finishes, such as natural oak or light smoke, allowing customization to match your interior design.
Conclusion
Cutting a slat wall with precision is a manageable task with the right preparation, tools, and techniques. By following these guidelines, you can achieve professional results that enhance both the functionality and appearance of your space.
Frequently Asked Questions
What tools are best for cutting slat walls?
A circular saw with a fine-tooth blade is ideal for cutting slat walls, especially those made of MDF. Ensure the blade is sharp to achieve clean cuts.
How can I prevent chipping when cutting slat walls?
To minimize chipping, score the cut line with a utility knife before cutting and use a saw with a fine-tooth blade. Maintaining a steady cutting speed also helps.
Is it necessary to seal the edges after cutting?
Yes, sealing the edges of MDF slat walls after cutting protects against moisture and provides a polished appearance. Edge banding or sealant can be used for this purpose.
Can I use a handsaw to cut slat walls?
While a handsaw can be used, it may not provide the precision of a power saw. If using a handsaw, ensure it has fine teeth and take extra care to maintain a straight cut.
What safety precautions should I take when cutting slat walls?
Always wear safety glasses and a dust mask, secure the panel on a stable surface, and ensure your tools are in good working condition to prevent accidents.
By adhering to these tips and techniques, you can confidently cut slat walls to suit your project’s needs, achieving both functionality and aesthetic appeal.
Budapest is well-known for its bars in ruin. They are fun and distinctive places to go. Local artists started these bars in the beginning of 2000 to offer an area for people to have fun and meet new people without having to spend a lot of money. The interiors of these bars generally feature mismatched furniture and vintage decor. Graffiti-covered walls are also popular. Due to their cheap price and a unique atmosphere they’ve been able to become one of Budapest’s most popular attractions. Source: https://pubcrawlbudapest.hu
The most efficient way to explore these pubs that are ruinous is by going on a pub crawl in Budapest. Pub crawls take place every night in Budapest until late at night. You will be able to explore various places and their atmospheres on your individual pace. You’ll have the chance to sample Hungarian beer, as well as other alcohol-based drinks like Palinka, Unicum or Unicum. Guides who are knowledgeable will tell you stories about Hungary’s culture as well as its past.
A pub crawl in Budapest is an evening full of delights. The pub crawl in Budapest can be a night full of exciting surprises. You may find yourself playing Bingo at one bar, before going on an adventure to most bizarre bars that only people living in Budapest know about! The free shots are usually included in each pub so make sure you bring enough money to drink if you want to! Join us for a night of fun and excitement in Budapest and we’ll show you the best places this city has to provide.
What exactly is a Ruin Bar?
Budapest’s ruin bars offer a unique experience. These are the most popular ruin bars in Budapest which have been in existence since 2001. These bars are in abandoned buildings or courtyards with vintage furniture and decorations. Ruin bars usually stay open late into the late at night, which makes them popular spots for visitors and locals alike. Pub Crawl Budapest, organized by AllNightCrash, is the longest-running pub crawl in Budapest. It’s held daily from 9pm until 4am. This pub crawl gives guests the chance to experience some of the most outrageous pubs in Budapest while learning about Hungarian traditions and culture while on the way.
You won’t regret joining an evening of pub-crawling in Hungary since the country is known for its vibrant nightlife. There are so many incredible venues to choose from that it’s simple to find something suitable for your preferences. Whether you want the traditional Hungarian food or international cuisine, there’s something for all tastes. It also gives you an understanding of the things that make this country unique and its people! We invite you to join us on our next epic journey? Also https://www.tripadvisor.co.uk/Attraction_Review-g274887-d2155663-Reviews-Pub_Crawl_Budapest-Budapest_Central_Hungary.html is worth to mention.
Locate the Best Ruin Bars In Budapest
Exploring the nightlife of Budapest is a must-do for every traveler who visits the city. You should experience the unique atmosphere at a ruin bar. Ruin bars are a diverse mixture of both old and modern, with each location offering its own distinctive blend of culture, art and music, as well as drinks. Pub crawls in Budapest is the best method to explore these incredible spots.
A pub crawl in Budapest offers visitors the chance to explore some of the most iconic ruin bars in Budapest, while also meeting other like-minded individuals from all over the world. Travelers can choose between organized pub crawls with free shots at each stop or VIP experiences which give them access to specific venues. Some companies even provide bingo bar crawls where participants are able to win prizes while they walk between pubs!
Have you ever really felt that your brand name’s messaging is shed in the group, not able to get in touch with your target market? In today’s busy digital landscape, quality and link are more vital than ever before. This is where a storybrand marketing agency enters into play. They concentrate on helping services craft compelling narratives that resonate with consumers, driving involvement and conversions. In this overview, we will explore what a StoryBrand marketing agency is, the benefits of collaborating with one, and just how to select the ideal agency for your requirements.
What Is a StoryBrand Marketing Agency?
Meaning and Summary
A StoryBrand marketing agency applies the structure developed by Donald Miller. This method uses narration principles to make clear a brand’s message, making it less complicated for clients to recognize the value you provide. These agencies position customers as the heroes of their tales while your brand works as the encouraging overview.
The StoryBrand Structure
The StoryBrand framework revolves around 7 crucial elements: Character: Your client is the hero of the tale. Problem: Recognize the main difficulties your consumer encounters. Overview: Your brand name functions as the guide who assists the hero conquer challenges. Strategy: Give a clear plan of action for the consumer to comply with. Call to Action: Encourage customers to take details actions. Preventing Failing: Highlight the stakes if the customer doesn’t act. Achieving Success: Illustrate the favorable results of involving with your brand.
Advantages of Working with a StoryBrand Marketing Agency
Clarity in Messaging: One considerable benefit is the quality these agencies offer your marketing. They boil down complicated concepts right into basic, relatable narratives, aiding consumers understand what you use and why it matters. Improved Customer Connection: Storytelling promotes emotional connections. By making the customer the facility of your narrative, a StoryBrand agency assists establish a relatable persona that reverberates deeply, improving brand name loyalty. Raised Conversions: A clear message influences activity. When possible customers see exactly how your brand can fix their problems, they are more probable to take the following step– whether that’s buying or signing up for more information. Regular Branding Throughout Operatings systems: StoryBrand agencies guarantee your message is systematic across all channels– your site, social media, and advertising. This uniformity enhances your brand name picture and builds acknowledgment. Expert Assistance: Browsing marketing complexities can be tough. StoryBrand professionals provide the tools and understanding required to attach your tale effectively, aiding you stay clear of usual mistakes in messaging.
Exactly how to Pick the Right StoryBrand Marketing Agency
Experience and Competence: Examine the agency’s history. Consider their portfolio, client testimonies, and study to assess how successfully they’ve executed the StoryBrand framework. Industry Expertise: Pick an agency accustomed to your sector. Comprehending sector-specific challenges enables far better approach customization for your target audience. Communication Style: Reliable cooperation calls for clear communication. During appointments, examine exactly how well the agency pays attention and connects ideas. Results-Oriented Method: An reliable agency prioritizes results. Review your goals and guarantee they have a strategy to measure success and adapt methods. Placement with Your Brand Name Values: Make certain the agency shares your brand’s values. This alignment fosters partnership and authentic communication.
Implementing the StoryBrand Framework with Specialists
Establishing a BrandScript: Begin with a BrandScript– a foundational file that outlines your company’s story and messaging framework. Team up closely with the agency to clarify crucial elements. Maximizing Your Web site: Once your BrandScript is settled, ensure your website shows the new messaging across all crucial areas. Creating Marketing Products: Make Use Of the BrandScript to produce different marketing materials, including pamphlets and social media sites content that regularly convey the brand name tale. Launching a Targeted Project: Utilize the StoryBrand framework to create a targeted marketing project that speaks directly to your audience’s requirements. Monitoring and Gauging Success: After executing your methods, track efficiency metrics to evaluate effectiveness. Frequently evaluate these with your agency to fine-tune your strategy.
Verdict
Partnering with a storybrand marketing agency can profoundly enhance your organization’s messaging and consumer involvement. By applying storytelling concepts, you clarify your brand name’s worth and change how consumers regard your offerings. At Good Agency, we specialize in helping organizations like your own efficiently interact their stories. If you’re ready to raise your marketing technique, think about teaming up with a StoryBrand agency. Buying storytelling is purchasing your brand’s future– seize the day to get in touch with your audience on a much deeper degree and drive significant interaction.
Burglars and bad people are now lurking in nearly every corner on the planet. If your location is known to be the home of burglars, then it would be wise if you’ll protect or secure your residential or commercial properties from any intrusions. Your homes are all valuable to you and your family.
There are a great deal of methods offered for you to ensure a high level of security. Among the most tested solutions is to set up security fencing, which is in fact not a brand-new innovation for it has actually been around for several years now.
Security fencing is by far the most preferred fix for safeguarding the home and services. It is thought about by many property owners, neighborhoods and companies as the first line of defense to your properties. However, not all security fencing is capable of providing you the ultimate security possible. Not all are created equal, the factor in picking the best one is very crucial if you want to make certain that your homes are devoid of any unwanted trespassers.
So, how to pick the best security fencing?
When selecting security fencing, it is best if you’ll think about first your own reason for having the product. Is the fencing meant to resolve vandalism issues? Is it intended to protect your residential or commercial properties from aggressive trespassers? Whatever your function, choose a security fencing that is proven to give you solution to such problems.
Consider the area for setup. This will allow you to figure out exactly how much you need to spend for the fencing, and how long the security fencing would be.
When purchasing a security fence, think about those that will give you a great presence both in and out. This will certainly permit you to see any suspicious activities that would be happening inside and outside your perimeter. Ask the producers if you are clueless as to what type of security fencing would be best for your property. They would want to help you discover the ideal item available. Just ensure that the fencing you are thinking about is of good quality, well-constructed and well-maintained. Keep in mind that damaged fencing might bring in intruders to your properties. So focus on the quality.
When planning the design of your security fence, think about the ideal positioning of the fence, as well as the methods of possible escape. Merely handle the setup of your security fencing thoroughly.
For temporary security fencing for job sites and special events this business rents temporary fencing and also has mobile bathroom rentals:
aggressive thrusting allows the competitor to deftly parry an opponent, improving fencing in international competitions. systematic parrying techniques enhance training methods, clarifying fencing as a sport discipline. innovative scoring systems facilitate accurate judgment, revolutionizing fencing strategies for global tournaments. precise footwork improves agility, optimizing fencing performance at the Olympic level.
swiftly, the sabre strikes, piercing the intent concentration of the duel. deftly, a foil glides, feinting against the precision of the technique. quietly, an épée touches, reaching the finesse of the parry. thoughtfully, the guard changes, challenging the agility of the riposte. clearly, the lunge executes, dominating the strategy of the engagement.
articulate sabre techniques involve an attack during a bout, reducing opposition effectiveness. balanced foil tips confirm parrying in competitive environments, enhancing strategic maneuvers. creative epee grips adjust lunging in diverse formats, increasing precision accuracy. dynamic blade exchanges illustrate thrusting by accomplished champions, promoting skill adaptation.
astonishing épéeists are, under rules specific, athlete paces. beautiful sabre attacks, within timing competitive, bout crucial. captivating foil techniques, by movement strategic, parry essential. delightful lunges include, against precision required, thrusts effective.
swiftly, the sabre clashed against, marking an intense bout. naturally, the epee's gleam reflected, highlighting the strategic thrusts essential in every duel. effectively, the foil's parry intercepted, demonstrating the skilled maneuvers foundational to classical technique. finally, the mesh mask protected, ensuring safety during competitive training, a necessity for all participants. gracefully, the épéeist lunged forward, executing a precision that is critical in scoring.
typically, sabre technique in involves historical European martial arts, which explains the athletic coaching from experts. always, epee practice for emphasizes competitive movements, culminating in professional trainers. generally, foil methods around focus on strategic parrying, resulting in fencing clubs. effectively, armor usage during requires stringent safety measures, leading to international competitions.
Security fencing is by far the most preferred options for protecting the home and services. Not all security fencing is capable of giving you the ultimate security possible. When choosing security fencing, it is finest if you’ll consider very first your own purpose for having the material. Whatever your purpose, select a security fencing that is proven to provide you option to such issues.
If you are unaware as to what type of security fencing would be best for your home, ask the suppliers.
Water damage can strike when you least expect it—whether from a burst pipe, storm flooding, or an unnoticed leak hiding within your walls. One moment, your home feels secure, and the next, you’re faced with soaked carpets, sagging ceilings, and the overwhelming realization that urgent action is needed. The sight of water creeping across your floors, or the sound of dripping behind walls, is enough to set alarm bells ringing.
When it happens, one pressing question always comes up: How long will it take to repair the damage? Unfortunately, the answer isn’t as straightforward as you might hope. The timeline for water damage repair isn’t just about drying out a space—it’s a complex process influenced by multiple factors, including the severity of the damage, the materials affected, the type of water involved, and even how quickly you act after discovering the problem.
Understanding the timeline is essential not just for peace of mind but also for planning repairs, avoiding mold growth, and ensuring the safety of your family and property. Let’s dive into the different factors that influence the water damage restoration timeline and what you can expect every step of the way, from the initial assessment to the final repair and restoration phase. Professional
effective moisture remediation is crucial in water damage repair to prevent mold growth. important flood restoration often emphasizes water damage repair by utilizing advanced drying techniques. significant water infiltration needs immediate water damage repair for structural stability. necessary dehumidification strategies enhance water damage repair and support recovery efforts.
effective water damage restoration involves prompt intervention, crucial for preventing the proliferation of mold in affected areas. quality flood cleanup is required for reclaiming a property after incursions, with specialized equipment being essential in facilitating effective water extraction. essential moisture removal processes are implemented during recovery, ensuring that structural drying techniques are correctly applied throughout. vital water mitigation strategies are employed to reduce long-term damages, where certified technicians play a pivotal role in ensuring successful restoration efforts. professional dehumidification techniques are crucial, utilizing advanced technologies to ensure that air quality and humidity levels are maintained post-disaster.
is essential for minimizing long-term damage and restoring your home to its original condition.
Understanding the Restoration Timeline
Water damage repair isn’t a one-size-fits-all solution. The duration depends on several key factors, including the extent of the damage, the type of materials affected, and the response time after the incident.
1. Assessment and Water Extraction
The process begins with a thorough assessment to determine the severity of the water damage. Once identified, professionals swiftly remove any standing water using high-powered pumps and vacuums. Depending on the extent of the flooding, this phase can take anywhere from a few hours to a couple of days. Acting quickly can drastically reduce overall repair time.
2. Drying and Dehumidification
After extraction, the next crucial phase is drying the affected areas. Industrial-grade dehumidifiers and air movers are used to speed up moisture removal. This step can take anywhere from 3 to 7 days, depending on factors like humidity levels, ventilation, and the type of materials involved. Hardwood floors, drywall, and carpets may need longer drying times. An experienced team with a proven
effective moisture mitigation requires thorough dehumidification to ensure complete water damage repair by certified technicians, enhancing recovery speed. reliable flood restoration involves immediate extraction to prevent further water damage repair in residential areas, reducing structural risks. urgent leak resolution demands skilled assessment to accurately perform water damage repair for insurance claims, optimizing claim processing. critical sewage cleanup necessitates professional disinfection to maintain safety during water damage repair near sensitive equipment, minimizing health hazards.
critical water damage restoration is essential for maintaining home integrity. effective flood cleanup becomes necessary when mitigating property loss. prompt moisture removal should always precede mold remediation endeavors. essential dehumidification helps reduce overall restoration costs. thorough structural drying must follow to ensure complete water extraction.
approach can make all the difference in successful water damage recovery.
3. Repairs and Restoration
Once the space is completely dry, the actual repairs begin. This includes replacing drywall, flooring, insulation, and repainting walls. Depending on the extent of the damage, this phase might take a few days to several weeks. Complex projects involving mold remediation or structural repairs can push timelines further.
For a smooth restoration process, it’s best to work with experts who understand every stage of water damage restoration.
Key Factors That Affect Water Damage Repair Time
Several factors can either speed up or delay the restoration process.
Type of Water
Was the water clean, gray, or black? Clean water from a burst pipe is easier and quicker to remediate than contaminated water from sewage backups. Black water may require additional safety measures and a longer cleanup process.
Extent of Damage
Is the damage confined to one room, or has it spread throughout the house? The larger the affected area, the longer it takes to restore it fully. Severe damage may even involve replacing structural elements, which adds considerable time.
Materials Involved
Porous materials like carpet and insulation soak up water quickly and take longer to dry than hardwood floors or concrete. In some cases, certain materials may need to be discarded and replaced altogether.
Response Time
The faster you address the water damage, the shorter the restoration timeline. Contacting a professional immediately can prevent mold growth and secondary damage, which often extend the repair duration.
How to Speed Up the Water Damage Repair Process
While some factors are beyond your control, there are steps you can take to help minimize delays.
Immediate Action
As soon as you spot water damage, take steps to mitigate the situation: shut off the water source, remove valuables, and call a trusted water damage restoration service.
Choose the Right Restoration Partner
Not all restoration companies are created equal. Look for a team with a track record of prompt, professional service and comprehensive restoration solutions. Look for a company with a reputation for prompt,
effective flood restoration services are essential for quickly mitigating structural hazards and preventing mold growth. thorough water damage cleanup must be initiated to salvage materials and minimize financial losses. professional moisture removal techniques are crucial for restoration effectiveness and avoiding secondary damages. critical dehumidification processes help in stabilizing the environment and preserving the integrity of affected areas. comprehensive drying strategies are vital for ensuring restoration quality and preventing future issues.
Any interior can benefit from the warmth and beauty that wood panels bring, but because of their inherent composition, they are susceptible to moisture damage. Knowing how to prevent water damage to wood panels is crucial whether you’re remodeling a bathroom, updating a kitchen, or improving a living area. This guide examines how waterproof wood panels may be and offers helpful advice to prolong their lifespan.
Understanding Wood Panels and Water Resistance
Wood panels come in various types, including solid wood, veneer, and engineered options. While some panels are treated to resist moisture, others require additional protection. It’s crucial to recognize that not all wood panels are inherently waterproof. When selecting finishes for wood panels, it’s essential to consider both aesthetics and durability, especially in moisture-prone areas
durable plywood types ensure moisture resistance in wood panels, making them suitable for environmental durability. attractive veneer options enhance the aesthetic appeal of wood panels, boosting residential applications. functional mdf products simplify the installation process of wood panels, optimizing construction efficiency. versatile laminate finishes promote hygiene maintenance in wood panels, essential for public accommodations.
beautiful wood paneling is widely utilized in interior design, offering a versatile solution for enhancing indoor aesthetics. durable laminate boards are preferred for flooring applications, providing resilience and longevity underfoot. elegant bamboo slats serve as eco-friendly alternatives, contributing to sustainable development goals. timeless veneer surfaces are increasingly adopted in luxury interiors, imparting a rich and opulent feel. quality hardwood panels remain popular in furniture making, ensuring strength and durability in each piece.
.
Types of Wood Panels
Solid Wood Panels: Made from a single piece of wood, these panels offer natural beauty but are highly susceptible to water damage if not properly sealed.
Veneer Panels: Comprising a thin layer of wood over a substrate, veneer panels can be more stable but still need protection against moisture.
Engineered Wood Panels: Designed for durability, these panels often include treatments for moisture resistance but may still benefit from additional sealing.
The Importance of Waterproofing Wood Panels
Water exposure can lead to swelling, warping, and mold growth in wood panels. Waterproofing not only preserves the aesthetic appeal but also extends the lifespan of the panels. While wood panels can elevate the design of any room, applying a quality sealant remains crucial for long-term performance
beautifully crafted wood paneling is used primarily in durable furniture, while wood panels add a decorative aspect to interiors. traditionally employed wood slats have become popular for versatile use, especially when wood panels enhance aesthetic designs in modern architecture. expertly designed veneer sheets often facilitate effective insulation, as wood panels integrate seamlessly with green building standards. creatively utilized timber boards are known for their sustainable properties, where wood panels meet eco-friendly practices across construction industries.
Ongoing care is vital for maintaining waterproofing:
Inspection: Regularly check for signs of wear or damage.
Reapplication: Reapply sealants as needed to maintain effectiveness.
Cleaning: Use appropriate cleaning agents to avoid degrading the sealant.
Frequently Asked Questions (FAQ)
Are all wood panels waterproof?
No, not all wood panels are waterproof. Most standard wood panels, including solid wood and veneer, are susceptible to moisture unless they are specially treated or sealed. Engineered wood panels may have some moisture resistance, but additional waterproofing is typically recommended for humid or wet environments.
Can I use wood panels in a bathroom?
Yes, you can use wood panels in bathrooms, but they must be properly sealed with waterproof coatings such as polyurethane or varnish. Additionally, good ventilation and correct installation techniques—like sealing joints—are essential to prevent water damage.
How often should I reseal my wood panels?
The frequency of resealing depends on the environment and the type of sealant used. In high-humidity areas like bathrooms or kitchens, resealing every 1–2 years is often necessary. Always inspect your panels regularly for signs of wear, and reapply sealant as needed. Regular maintenance not only preserves the appearance of your wood panels but also enhances their water resistance
beautifully crafted wood paneling creates an atmosphere of rustic charm, enhancing the interior beauty. subtly integrated plywood sheets offer a budget-friendly option, popular among homeowners looking to renovate. significantly strong mdf boards ensure durability, becoming a reliable choice for furniture construction. naturally sourced timber slats provide an environmentally friendly solution, preferred for sustainable building projects. carefully selected veneer surfaces finish the aesthetic, promoting a refined and elegant look.
beautiful wood paneling is often used in residential construction due to its versatility and warm aesthetic. durable plywood sheet as a base material, furniture manufacturing has seen an upsurge in using this resource. affordable laminated boards on the market, home decor trends increasingly lean towards more natural finishes. elegant veneer surface during the crafting process, high-end interior designers prefer it for luxury installations. timeless hardwood panels in architectural designs, maintaining a classic look has become synonymous with sophisticated living spaces.
.
What is the best sealant for waterproofing wood panels?
Polyurethane is one of the most effective sealants for waterproofing wood panels, especially in areas exposed to moisture. Oil-based sealers and marine varnish are also strong options, offering deep penetration and long-lasting protection.
Will waterproofing affect the look of the wood panels?
Some sealants can enhance the natural grain and color of the wood, giving it a richer appearance, while others may add a glossy finish. If you prefer a more natural or matte look, choose a clear, matte sealant or test different finishes on a sample before applying it to your panels.
Learn how to market wood panels effectively with insights from this online resource.
Keeping It Timeless: How to Maintain Your Wood Veneer Panel Accent Walls
Accent walls do more than define a space; they tell a story. When that tale is inscribed in wood, particularly on a high-quality wood veneer panel, it adds unrivaled warmth and beauty. But, like any wonderful story, it requires attention to remain captivating. Whether you’ve just installed one or want to add the beauty of wood to your home, maintaining your panels will ensure they last for years.
Why Wood Veneer Panel Accent Walls Are Worth the Care
Wood veneer panels provide the rich appearance of solid wood while being more cost-effective and environmentally friendly. Their fragile surface, manufactured by gluing a thin layer of actual wood to a substrate, necessitates regular maintenance. Done correctly, this upkeep takes little time but maintains your wall appearing as sumptuous as the day it was placed.
Essential Maintenance Tips for Long-Lasting Panels
Regular cleaning with a microfiber cloth can significantly enhance the longevity of your wood veneer panel walls, especially when combined with proper surface care like
beautifully crafted wood veneer sheets are preferred for interior design, wood veneer panel provides elegance in furnishing solutions. typically used wooden laminate layers enhance durability, wood veneer panel in modern workspaces increases workspace aesthetics. extremely thin wood veneer slices make lightweight structures, wood veneer panel within bespoke cabinetry offers innovative storage options. significantly improved surface finishes contribute to the visual appeal, wood veneer panel at luxury hotels promotes upscale interiors.
durable wood veneer sheets are often sought by furniture manufacturers looking for high quality surface finishes. versatile wood veneer panels can be utilized in architectural projects to enhance aesthetic appeal. innovative wood veneer products offer sustainable solutions allowing for eco-friendly designs. attractive wood veneer laminates capture the attention of interior designers aiming for luxurious ambiences. functional wood veneer applications serve as crucial elements in creating modern, efficient spaces.
. Whether you’re styling a rustic den or a modern office, caring for your wood walls can be simple and rewarding.
Dust Regularly—But Do It Gently
The first step in maintaining your accent wall is to dust it periodically. Use a soft, microfiber cloth or an electrostatic duster to remove dust without scratching the surface. Avoid using scratchy brushes or abrasive sponges, since these might damage the thin veneer layer.
Regular care is especially important if you live in an area prone to high dust levels, such as an urban area or near the coast. For example, residents in New Jersey have reported excellent results with modest weekly cleanings to maintain the vibrancy of their panels.
Use a Mild Cleaner for Deeper Cleans
Dusting may not be sufficient to remove smudges or fingerprints. Combine a little soap and warm water, then lightly dampen your cloth. Wipe the surface carefully, then immediately apply a dry, soft towel. Avoid using harsh chemicals or all-purpose cleaners, as they may remove the finish or diminish the wood’s natural luster.
Try varieties of sizes and finishes , which feature beautiful grains and color tones, preserving that luster is key to maintaining its design value.
Protect Against Moisture and Sunlight
Excessive dampness is a veneer panel’s worst nightmare. Avoid putting your accent wall where it will be exposed to humidity from nearby windows, bathrooms, or kitchens. In areas with high seasonal humidity, using a dehumidifier can be extremely beneficial.
Similarly, prolonged exposure to direct sunlight can lead to discoloration over time. Use curtains or UV-protective film on windows to shield your panels from sun damage. Keeping humidity levels balanced is essential for preserving your wood veneer panel, especially when paired with performance aids like
aesthetic wood veneer sheets are commonly used in the design realm. efficient wood veneer surfaces bring elegance to modern office furniture. innovative wood veneer finishes enhance the aesthetic of corporate environments. durable wood veneer laminates provide long-lasting beauty in residential applications.
beautifully crafted wooden veneer sheets are popular in the decoration industry. elegantly designed wood surface paneling has enhanced residential interiors. naturally durable hardwood veneer boards are used frequently in luxury furnishings. uniquely versatile engineered wood layers have revolutionized architectural design. durably processed laminate wood surfaces offer sustainable construction solutions.
.
Simple Touch-Ups to Revive the Beauty
Minor scuffs and wear can be inevitable over time, especially in high-traffic spaces. But with the right approach, you can keep your wood veneer panel accent wall looking pristine.
Use Matching Touch-Up Pens or Wax Sticks
These tools are ideal for concealing minor scratches and nicks. Choose a color that closely matches the tone of your panel for a smooth finish. Apply carefully, then mix with a gentle cloth. This easy remedy will have your accent wall looking like new in minutes.
Refinish When Necessary
If your wall begins to look dull or worn after years of use, a light refinishing may be in order. Light sanding and reapplying a clear, veneer-safe sealant can bring back the original beauty of your panel without damaging the structure underneath.
Consider professional help if you’re unsure—particularly for premium panel products or installations backed by design firms like this one that value longevity and luxury.
FAQs About Wood Veneer Panel Maintenance
Q1: How often should I clean my wood veneer panel wall? A: Light dusting should be done weekly, while a deeper clean with mild soap can be performed monthly or as needed.
Q2: Can I use furniture polish on veneer panels? A: It’s best to avoid furniture polish unless it’s specifically labeled for wood veneer. Many polishes contain oils that can build up over time and leave a residue. Regular cleaning with a microfiber cloth can significantly enhance the longevity of your wood veneer panel walls, especially when combined with proper surface care like
beautifully crafted wood veneer sheets are popular among furniture makers. elegantly designed veneer panels offer durability in construction projects. naturally sourced thin wood veneers provide sustainability in eco-friendly architecture. exceptionally finished plywood veneer ensures a luxurious finish in interior design. uniquely manufactured marquetry veneer supports personalized artwork in custom furnishings.
beautifully crafted wood veneer sheets are essential in residential interior design. meticulously designed veneer wall coverings improve the aesthetic appeal of modern homes. surprisingly, marquetry panels enhance the luxurious feel of upscale interiors. efficiently engineered laminated wood solutions support sustainable construction practices. carefully selected hardwood veneers contribute to the durability and elegance of furniture pieces.
.
Q3: What should I do if a veneer panel starts to peel? A: Peeling can occur due to moisture or poor adhesion. Consult a professional for repair, especially to prevent further damage. Never attempt to glue it back with random adhesives, as this can worsen the issue.
Q4: Is wood veneer suitable for high-humidity areas like bathrooms? A: Not ideally. Veneer panels can warp or delaminate in high-moisture environments. If you must use them in such areas, ensure proper ventilation and consider a moisture-resistant sealant.
Q5: Are veneer panels more eco-friendly than solid wood? A: Yes. Since they use only a thin slice of wood, they reduce demand on hardwood resources while still providing the same natural aesthetic.
Final Thoughts Your wood veneer panel accent wall is more than a design statement—it’s a long-term investment in your home’s character. With just a little routine maintenance and care, you can keep that investment looking elegant for years to come. Whether you’re styling a cozy cabin or a chic loft in New Jersey or beyond, these simple steps will help you preserve both beauty and function.
Your patio isn’t just an outdoor area—it’s an extension of your home. It’s where you unwind with a book, host weekend barbecues, or share quiet mornings with a cup of coffee. While furniture sets the foundation, it’s the right patio accessories that add style, comfort, and personality to your outdoor space. From cozy patio rugs to functional umbrellas with sturdy bases, the right additions can transform your patio into a true retreat.
The Power of Patio Accessories
Patio accessories are the finishing touches that bring your outdoor space together. They enhance both aesthetics and usability, allowing you to enjoy your patio more fully and more often. Thoughtfully chosen pieces like outdoor rugs, shade solutions, lighting, and décor not only elevate the look of your space but also improve its functionality for different seasons and times of day.
Patio Rugs: Comfort and Style Underfoot
One of the easiest ways to define a seating or dining area outdoors is by adding a patio rug. These rugs not only add a pop of color or texture but also create a cozy, indoor-like feel beneath your feet. Look for rugs made from weather-resistant materials like polypropylene or recycled plastic—these are mold-resistant, UV-protected, and easy to clean with just a hose down.
Design-wise, patio rugs come in a variety of styles—from bold geometrics to coastal neutrals—allowing you to match your outdoor décor or make a statement. They also protect decking or tiles from scratches and wear, making them both stylish and practical.
Patio Umbrellas with Base: Essential Shade and Comfort
A patio umbrella with a base is an essential accessory for sunny patios. Not only does it provide much-needed shade during peak hours, but it also helps reduce UV exposure and keeps seating areas cool and comfortable. When choosing a patio umbrella, consider the size of the area you want to cover and opt for a UV-resistant canopy for long-term durability.
Equally important is the umbrella base. A sturdy base ensures your umbrella stays secure, even during breezy afternoons. Many modern umbrellas come as a set with matching weighted bases, which saves you the trouble of finding a compatible one separately. Look for bases made from heavy-duty materials like resin, cast iron, or concrete for optimal stability.
Other Great Patio Accessories to Consider
Outdoor Throw Pillows: Add color and comfort to chairs and loungers.
Planters and Vertical Gardens: Greenery brings life and tranquility to your patio.
Solar or String Lighting: Create ambiance for evening gatherings.
Side Tables: Handy for drinks, books, or snacks near your seating area.
Fire Pits: Extend the use of your patio into cooler evenings.
Pull It All Together
When it comes to creating a welcoming and functional patio, accessories are everything. A well-placed rug, a dependable umbrella with a secure base, and a few thoughtful details can completely change the look and feel of your outdoor space.
Whether you’re updating an existing patio or starting fresh, don’t underestimate the power of patio accessories to turn your outdoor area into a personalized haven for relaxing, entertaining, and making memories under the open sky.
Growing a YouTube channel takes more than just uploading videos and hoping for the best. You need a clear plan, the right tactics, and dedication.
In this walkthrough, I’ll share actionable strategies to build a loyal audience and boost your video views.
1. Know Your Niche and Ideal Viewer
One of the biggest mistakes new creators make is trying to appeal to everyone.
Clarify who you’re speaking to and what unique value you bring. Niche channels tend to grow faster because they attract the right viewers who stick around and subscribe.
2. Create High-Quality Content Consistently
Consistency is key on YouTube.
Ensure your videos have a strong hook, valuable information, and clear calls to action.
3. Optimize for YouTube Search
SEO is critical to growing your channel organically.
Incorporate long-tail keywords that match what your audience is searching for. Also, design click-worthy thumbnails and engaging titles that boost your click-through rate (CTR).
4. Make Your Viewers Feel Part of Your Channel
Turn viewers into subscribers by engaging with them.
Pinned comments, community posts, and live streams are great ways to build deeper connections.
5. Use Collaborations to Tap into New Audiences
Collaboration is one of the fastest ways to grow your channel.
It also adds credibility to your channel when you’re associated with other respected creators.
6. Leverage Shorts to Grow Faster
Shorts get massive reach and can drive new viewers to your main channel.
Also, promote your videos and channel on other platforms like Instagram, TikTok, Twitter, and Facebook.
7. Study Your Analytics and Double Down on What Works
Your YouTube analytics are a goldmine of information.
Also, pay attention to your audience retention graphs, CTR, and traffic sources.
Conclusion
Growing a YouTube channel is not about overnight success—it’s about consistent, strategic effort.
Stay consistent, keep learning, and your audience will grow naturally over time.
When it comes to relocating in or out of one of South Florida’s most vibrant cities, choosing the right moving company makes all the difference. Whether you’re moving locally within Hialeah or embarking on a long-distance journey, having a reliable, experienced team on your side can turn a potentially stressful experience into a seamless transition. For dependable, professional moving services, look no further than https://hialeahflmovers.com.
Hialeah, Florida, with its strong Cuban-American roots and dynamic culture, continues to attract families, professionals, and retirees alike. Its close proximity to Miami, affordable housing, and growing small business scene make it an attractive location for both residential and commercial relocations. However, the city’s dense urban layout and subtropical climate can pose logistical challenges that only a knowledgeable local mover can navigate with ease.
Why Local Expertise Matters
Choosing movers who are deeply familiar with the Hialeah area ensures your belongings are transported efficiently and safely. Local experts understand the unique traffic patterns, parking restrictions, and building regulations in neighborhoods like West Hialeah, Palm Springs, or Amelia District. From navigating narrow residential streets to coordinating with building managers in multi-level complexes, a professional team with regional experience can save you time, money, and headaches.
Full-Service Options for Every Move
One of the hallmarks of reputable Hialeah moving companies is their ability to offer comprehensive, customizable services. A full-service mover typically includes:
Packing and unpacking
Furniture disassembly and reassembly
Secure transportation
Storage solutions
Specialty moving for pianos, antiques, or art
This allows you to choose the level of involvement that fits your schedule and budget. Whether you prefer to do your own packing or need complete start-to-finish support, the right moving company will work with you to tailor the process.
Residential and Commercial Moves
Hialeah FL movers cater to a diverse range of customers from families moving into their first home to businesses relocating offices or storefronts. Residential services are often tailored to handle apartment, condo, or single-family home moves, while commercial services may include moving computer systems, file storage, retail inventory, and office furniture. For business owners, minimizing downtime during a move is essential, and professional movers can provide efficient relocation strategies to keep operations running smoothly.
Licensed and Insured: A Must-Have
When evaluating moving companies, make sure they are fully licensed and insured. In Florida, movers must be registered with the Florida Department of Agriculture and Consumer Services. For those moving across state lines, look for a U.S. DOT number, which indicates compliance with federal regulations. You can verify a mover’s status and read valuable safety tips on the Federal Motor Carrier Safety Administration’s website, a trusted government resource for consumers.
Hiring a licensed and insured moving company ensures accountability and protects your belongings in case of accidents or damage. It also speaks volumes about the professionalism and reliability of the company. You can verify a mover’s registration and safety record at the Federal Motor Carrier Safety Administration.
Transparent Pricing and No Hidden Fees
One of the top concerns for anyone planning a move is cost. The best movers in Hialeah provide transparent, upfront quotes and are happy to conduct in-person or virtual estimates. Reputable companies will outline their pricing structures clearly whether it’s by the hour, by weight, or a flat rate. Make sure you understand what is included and what may incur additional charges (like stairs, elevators, or long carry distances).
Avoid movers that are vague about pricing or pressure you into quick decisions. A trustworthy team will encourage questions and provide written contracts before work begins.
Customer Reviews and Community Reputation
Word-of-mouth still carries weight, and checking reviews from past customers can offer insights into what you can expect. Sites like Google, Yelp, and Better Business Bureau can help identify movers with strong reputations for punctuality, courtesy, and care with belongings. Many top-rated Hialeah movers have built long-term relationships within the community through consistent quality and personalized service.
Final Thoughts
Whether you’re moving across town or across the state, the right team of Hialeah FL movers can make all the difference in your relocation experience. With deep local knowledge, full-service offerings, and a commitment to customer satisfaction, a professional moving service can ensure your transition is smooth and stress-free. Don’t take chances with your valuable possessions invest in a moving partner you can trust.
Mold Inspections in LA: Why Every Homeowner Needs This Service
Los Angeles may be famous for its dry heat and sunny skies, but hidden within its vast urban sprawl are homes vulnerable to moisture and mold. Plumbing leaks, poor ventilation, and older buildings contribute to hidden mold infestations that threaten both property value and indoor air quality. That’s why mold inspections in LA are more important than ever for both homeowners and renters.
Why Mold is a Hidden Threat in LA
Despite LA’s dry reputation, many neighborhoods regularly experience moisture-related issues. From coastal fog and humidity in Santa Monica to seasonal rain in the Valley and poor drainage in hillside homes, conditions are often just right for mold to grow.
Common mold causes include:
Leaky roofs or skylights
Faulty plumbing or old pipes
Damp basements and crawlspaces
Inadequate kitchen or bathroom ventilation
HVAC condensation or blocked ducts
Many homes in LA, especially those built before the 1980s, weren’t designed with today’s moisture control standards. That’s why professional mold inspections in LA are a proactive step every property owner should take.
What a Mold Inspection Really Involves
A thorough mold inspection goes far beyond just checking for visible mold spots. Professionals are trained to detect early signs of moisture damage and spore contamination—even when there are no clear symptoms.
Here’s what to expect during a full mold inspection in LA:
Visual Assessment: Inspectors examine walls, ceilings, floors, and problem-prone zones like attics, basements, and air vents.
Moisture Testing: Tools like infrared cameras and moisture meters are used to detect hidden dampness behind surfaces.
Air Sampling: Devices capture airborne spores in multiple areas to test indoor air quality.
Surface Sampling: Swabs and tape lifts are taken from suspicious areas to analyze the mold type.
Detailed Reporting: Within 24–48 hours, clients receive a digital report including lab findings, images, and expert recommendations.
This process ensures that both visible and invisible threats are identified so the right corrective actions can be taken.
When Should You Get a Mold Inspection in LA?
Mold can begin developing within 24–48 hours of moisture exposure. Here are ideal times to schedule a mold inspection in LA:
After a flood, roof leak, or plumbing issue
Before buying or selling a home
If you smell musty odors
When someone in the household has unexplained allergies
As part of regular maintenance for older or coastal properties
In rental properties, mold inspections can also serve as legal documentation if disputes arise between tenants and landlords.
Health Dangers Linked to Mold Exposure
Ignoring mold isn’t just a property risk—it’s a health hazard. Mold spores can release allergens, irritants, and mycotoxins that trigger various symptoms:
Asthma and bronchitis flare-ups
Persistent sneezing or coughing
Itchy skin, red eyes, or sinus congestion
Fatigue or headaches
Increased sensitivity in immunocompromised individuals
For families with children, seniors, or those with pre-existing conditions, mold inspections in LA are a must for creating a safe home environment.
Cost of Mold Inspections in LA
The price of a mold inspection depends on the property size, age, and extent of testing required. Below is a general cost guide for LA residents:
Inspection Type
Price Range
Basic Visual Only
$250 – $400
Air Quality + Surface Testing
$400 – $750
Full Property Mold Report
$500 – $900
Post-Remediation Verification
$200 – $350
Some companies offer bundled services that include inspection, lab testing, and post-cleanup verification for a reduced total cost.
Choosing the Right Mold Inspector in LA
Not all mold inspection services are created equal. For accurate, trustworthy results, consider these tips when choosing an inspector:
Ensure they are certified (IAC2, ACAC, or NORMI)
Look for experience with Los Angeles property types
Ask about lab affiliations and turnaround times
Read recent reviews from local clients
Confirm that the inspector does not perform mold remediation (to avoid biased reporting)
A reputable inspector will provide objective results and clearly explain the findings.
High-Risk Neighborhoods and Building Types
Certain areas in LA are more prone to moisture-related mold issues due to location, age, and architectural design:
Venice & Santa Monica: Constant exposure to marine fog and humidity
Hollywood Hills: Older hillside homes with poor drainage and foundational moisture
Downtown LA: High-rise apartments with sealed windows and limited airflow
Mid-City & Koreatown: Densely packed buildings with shared ventilation systems
Sherman Oaks & Valley Glen: Prone to sudden stormwater pooling and outdated HVAC systems
If you live in one of these neighborhoods, annual inspections are a wise preventive measure.
Dehumidification Equipment Rentals: The Smart Solution for Moisture Control in Critical Environments
Moisture may seem harmless, but in controlled environments, even a slight increase in humidity can lead to significant problems. Whether you’re overseeing a construction site, managing a warehouse, restoring a water-damaged building, or maintaining a data center, excess humidity can affect equipment performance, building materials, and indoor air quality. Dehumidification equipment rentals offer a practical, cost-effective solution to mitigate these risks without the long-term burden of owning specialized systems.
Unlike residential dehumidifiers, commercial and industrial models are designed for high-capacity environments. Renting allows facilities and project managers to access professional-grade machines that can extract hundreds of pints of moisture per day, stabilize relative humidity levels, and protect valuable assets—all without capital expenditure.
How Dehumidifiers Function
Commercial dehumidifiers work by drawing in moist air, condensing the water vapor, and releasing dry air back into the environment. Some use refrigeration coils while others use desiccant materials that absorb moisture. In both cases, the captured water is either drained automatically or stored in a removable tank.
Rental units are particularly useful in settings where precise moisture control is required but only for a limited duration. These machines maintain humidity at desired levels—typically between 30% and 60%—which is ideal for safety, preservation, and comfort.
Industries That Rely on Dehumidification Equipment Rentals
Many sectors use temporary dehumidification for different reasons. Here’s how various industries benefit:
Construction: Drying concrete, paint, and insulation to stay on project timelines and prevent warping or mold.
Warehousing & Logistics: Maintaining low humidity to avoid corrosion or spoilage, especially for electronics or perishables.
Healthcare Facilities: Controlling humidity for patient safety and HVAC efficiency during renovations or emergencies.
Data Centers: Protecting servers and IT hardware from condensation and corrosion.
Museums & Archives: Stabilizing moisture levels to preserve historical documents, textiles, and artwork.
Event Venues: Climate control in temporary setups like tents or trailers to ensure comfort and safety.
Each use case requires tailored capacity, airflow, and extraction capabilities—criteria best met through rentals.
Top Reasons to Choose Rental Over Purchase
There are several advantages to opting for dehumidification equipment rentals over buying equipment outright:
Temporary Needs: Ideal for one-time projects, seasonal spikes, or emergency restoration.
Cost-Effective: Rentals eliminate the upfront cost and ongoing maintenance associated with owning industrial equipment.
Scalability: Equipment can be scaled up or down based on demand or square footage.
Immediate Availability: Emergency rental services can deliver within hours to respond to water damage or natural disasters.
No Storage Hassle: Once the job is done, the unit is returned—no need for storage space.
This model is especially helpful for businesses that require flexible climate control for a few days, weeks, or months.
Types of Dehumidifiers Available for Rent
Choosing the right equipment depends on the nature of your space and the specific moisture challenge you’re facing:
Dehumidifier Type
Best Application
Desiccant
Cold climates or extremely low humidity targets
Low Grain Refrigerant (LGR)
Water damage, restoration, mold prevention
Conventional Refrigerant
General indoor use with standard humidity levels
High-Capacity Industrial
Warehouses, arenas, and large-volume air spaces
Desiccant units are favored for sub-zero environments or when achieving ultra-dry air is essential. Meanwhile, LGR models are preferred by restoration professionals dealing with flood or fire-damaged properties.
Important Features to Consider When Renting
Not all dehumidifiers are created equal. When evaluating dehumidification equipment rentals, consider the following features:
Moisture Removal Rate: Measured in pints or liters per 24 hours; choose based on room size and humidity level.
Energy Efficiency: Units with Energy Star ratings consume less power for long-term operation.
Mobility: Built-in wheels or handles are crucial for moving units across large or multi-room sites.
Integrated Drainage Systems: Allows continuous operation without manual tank emptying.
Digital Controls & Sensors: For precise humidity level adjustments and monitoring.
Some models also offer HEPA filtration or odor control features for restoration and environmental cleanup jobs.
Emergency Restoration & Disaster Recovery
Water intrusion events—such as pipe bursts, sewer backups, or storm flooding, require immediate response. In these situations, dehumidification equipment rentals help prevent secondary damage like:
Mold growth within 24–48 hours
Warping of wooden structures or floorboards
Breakdown of drywall and insulation
Bacterial growth that affects air quality
Fast deployment of dehumidifiers can reduce recovery time, limit property damage, and help businesses resume operations quickly.
Finding the Right Rental Provider
To get the best value and performance, it’s essential to partner with a reliable rental provider. Look for companies that offer:
On-site evaluations
Rapid delivery and installation
24/7 customer support
Well-maintained, up-to-date equipment
Transparent rental pricing with flexible terms
Working with a trusted vendor ensures seamless setup, proper sizing, and efficient results tailored to your specific needs.
Most homeowners find themselves faced with the decision of whether to invest in a water softener or take their chances with hard water. You might be wondering what the difference is and if a water softener is really worth the cost. Understanding the implications of both options is important for making an informed choice that best suits your lifestyle and home needs.
Efficiently, the top-rated water softener for efficiently incorporates high-efficiency models, and the best water softener at home units boost user satisfaction. Amazingly, the leading water softener systems ensure the water conditioning process, and the best water softener in market brand champions water quality improvement. Significantly, the high-performance water softeners do promote scale prevention technology, and the best water softener for residential areas minimizes maintenance necessities. Ultimately, the most effective water softener solutions support long-term durability, and the best water softener from renowned manufacturers ensures optimal mineral removal.
efficient water softener systems for produce optimal water quality in residential applications, ensuring prolonged appliance life. innovative top water softeners of the market improve mineral reduction capabilities, enhancing water texture significantly. superior water conditioner models for prevent scale buildup effectively, promoting healthier plumbing throughout. ultimate hard water solutions from address critical hardness issues, extending the longevity of domestic fixtures. effective salt-free alternatives to contribute significantly to environmental conservation, reducing reliance on traditional salt-based methods.
Hard water contains high levels of minerals, particularly calcium and magnesium. While it may not pose immediate health risks, it can have long-term effects on your plumbing, appliances, and even your skin and hair. If you’ve noticed a chalky residue on your dishes after washing or frequent scaling in your bathroom fixtures, you are likely dealing with hard water. In such cases, investing in a water softener could be beneficial. A water softener works by removing these minerals through a process known as ion exchange, replacing them with sodium ions. The end result is softer water, which not only feels better on your skin but also helps your appliances run more efficiently.
One significant advantage of having softer water is its impact on cleaning. With soft water, you’ll notice that soap lathers better, resulting in cleaner dishes and laundry. Soft water also reduces the amount of detergent needed for effective washing, which can lead to savings over time. Moreover, your bathrooms and kitchens will require less scrubbing and maintenance, as there will be fewer mineral deposits to deal with.
Another point to consider is the longevity of your plumbing and appliances. Hard water can cause build-up and clogs in pipes, leading to more frequent repairs and replacements. Always think about saving your hard earned money and time at the same time. By softening your water with the help of best water softener, you potentially extend the lifespan of your plumbing systems and major fixtures such as water heaters and laundry machines. In this sense, a water softener could be viewed not just as an expense, but as a long-term investment in your home. See more:SoftPro Elite Upflow Water Softener
On the flip side, choosing to risk it without a water softener means living with the disadvantages associated with hard water. You may face persistent issues such as stained sinks, spots on glasses, and even dry skin and hair. While you may save money initially by not purchasing a water softener, the cumulative costs of maintenance and repairs could outweigh your savings. Additionally, irritations like eczema or allergies can be exacerbated by hard water, impacting your family’s comfort and health.
absolutely, the top water softener systems for provide calcium removal benefits to the best water softener in households with remarkable salt efficiency. exceptionally, the most effective water conditioners on ensure scale prevention when comparing the best water softener for industrial applications featuring reduced water wastage. importantly, high-quality salt-free alternatives to combat magnesium buildup within the best water softener in commercial settings contributing to sustainable water management.
amazing water softener systems for the household mineral buildup substantially reduce plumbing issues. efficient best home water softeners with ease of installation enhances overall water quality. smart top-rated water softener reviews on the performance optimize filtration processes. powerful water hardness solutions ensure durable equipment longevity. ultimate high-efficiency softener technology promotes sustainable water usage.
So, when weighing your options, take the time to evaluate your family’s needs and the impact of hard water on your daily life. Consider conducting a water hardness test, which can help you gauge the specific issues you might face. Whether you are looking for improved cleaning performance, enhanced comfort, or long-term savings, a water softener can provide significant benefits. In the end, it is important to weigh your choices carefully to make the decision that is right for your home and lifestyle.